How To Plan a Wedding Day Timeline
If you are looking for a simple way to create a wedding day timeline that works for your big day, you have come to the right place.
Your wedding day is going to be filled with so many beautiful moments thanks to all the planning you have done.
Important details such as getting ready with your bridesmaids, walking down the aisle, taking photos with your new husband, enjoying dinner with your favourite people, cutting the cake and dancing the night away are all things you want for your big day.
Ideally, you want to fit all of it into the timeframe you have during your big day.
With so many things happening on the same day, it can quickly become overwhelming if you don’t have a proper plan.
That’s where a wedding timeline comes in.
A well-planned wedding day timeline helps everyone know where they need to be, when they need to be there and what is happening next.
It also gives your wedding vendors a clear schedule to work from and helps prevent your wedding day from feeling rushed.
And you want the good news?
You don’t need to be a professional wedding planner to create one.
Although they can be extremely helpful.
Especially for running the day and keeping everything on schedule.
Whether you are planning a small intimate wedding, a backyard wedding, a traditional celebration or a large wedding with a full reception, this step-by-step guide will show you how to create a wedding timeline that actually works.
From deciding when hair and makeup should begin to planning your wedding ceremony, photos, cocktail hour, dinner, speeches and dancing, here’s everything you need to know.
So, what is the best way to create a wedding timeline?
Before we get started on creating a wedding day timeline, we wanted you to take the time to like our Facebook Page here! We also use affiliate links in our blog posts, meaning we can make a commission if you use any of our affiliate links.
If you are getting married this year, join our Bridal Facebook Group here.
Another popular group is the Wedding Planning 2026-2029!
Sign up for your FREE wedding planning checklist here!

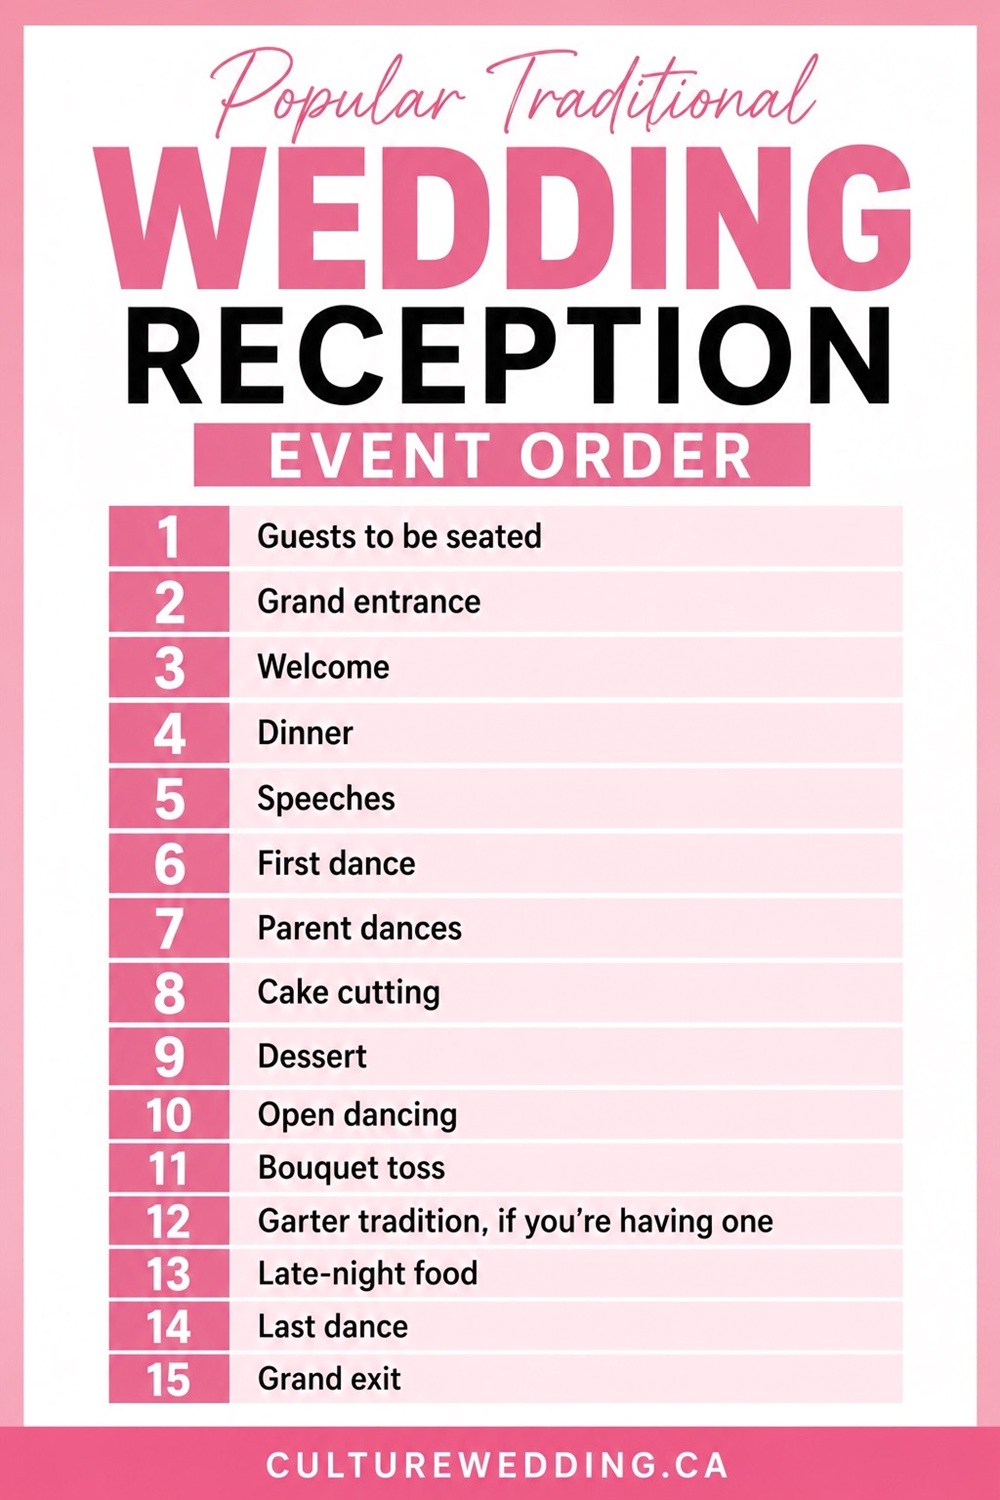
What Is a Wedding Timeline?
A wedding timeline is a detailed schedule showing everything that will happen on your wedding day and when it will happen.
Think of it as your wedding day roadmap.
Your wedding day timeline can include:
- Hair and makeup
- Getting dressed
- Wedding party arrival
- Photographer arrival
- First look
- Bridal portraits
- Wedding party photos
- Family photos
- Transportation
- Guest arrival
- Wedding ceremony
- Cocktail hour
- Reception entrance
- Dinner
- Wedding speeches
- First dance
- Parent dances
- Cake cutting
- Sunset photos
- Open dancing
- Bouquet toss
- Last call
- Grand exit
- Vendor breakdown
The idea isn’t to schedule every single second of your day or have it completely planned out.
Your wedding day schedule should give everyone involved enough information to keep the day moving while still leaving room to breathe.
Believe me, you will need breathing room.
A good timeline should make your wedding day feel organized, not rushed.
Why Do You Need a Wedding Day Timeline?
You may be wondering if you really need a detailed wedding timeline.
The answer is yes!
This shouldn’t even be a question.
Your wedding day involves a lot of moving parts.
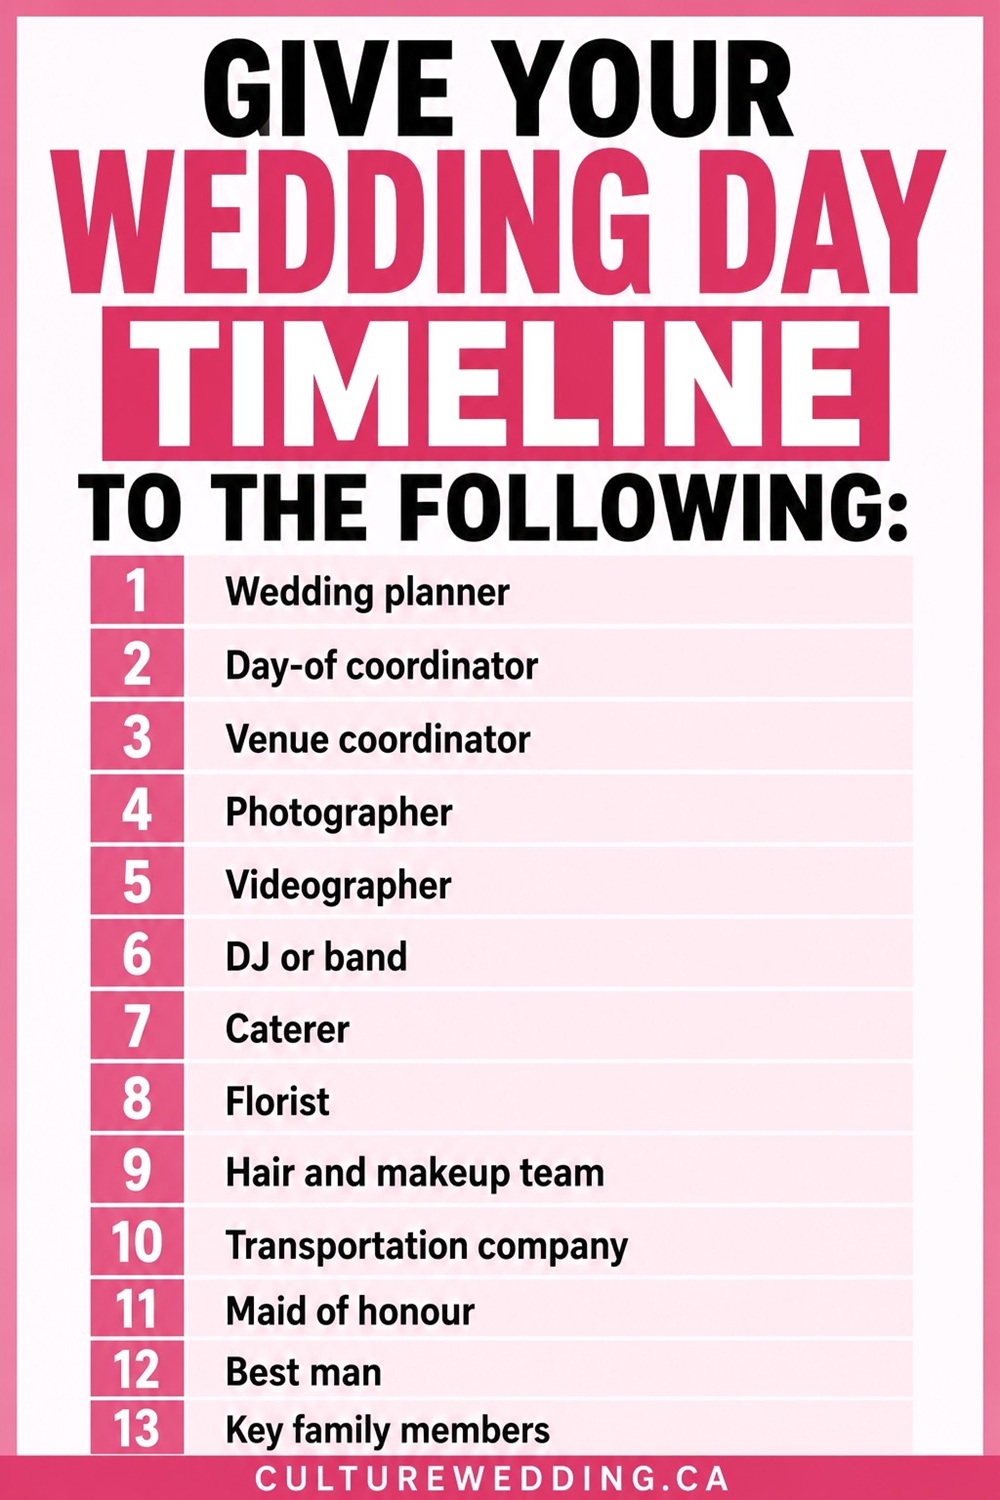
Your photographer, videographer, hair and makeup team, florist, caterer, DJ, transportation company, venue coordinator, wedding party and family members may all need to know when certain things are happening.
And if you were the one who planned the wedding, you are most likely the only person who knows how everything will work out.
You need this plan on paper somewhere.
Without a timeline, it’s easy for small delays to turn into bigger problems.
For example, if family photos take longer than expected, that could push back your cocktail hour, dinner, and reception.
A timeline gives everyone a shared plan.
It also allows your vendors to coordinate with one another instead of everyone working from a different schedule.
Most importantly, creating a wedding timeline before the big day means you don’t have to make all of these decisions while you are actually getting married.
You can simply enjoy your day.
How to Create a Wedding Timeline Step by Step
Creating your wedding timeline may seem complicated at first, but it’s much easier when you break it down into steps.
Here’s exactly where to start.
Step 1: Start With Your Wedding Ceremony Time
The easiest way to create your wedding day timeline is to start with the most important fixed point of the day:
Your ceremony start time.
For example, let’s say your wedding ceremony begins at 3:00 PM.
Now you can work backwards to figure out when everything needs to happen before the ceremony.
You will need to consider:
- When the venue opens
- When vendors can arrive
- When hair and makeup begins
- When the photographer arrives
- When you need to get dressed
- Whether you’re having a first look
- How long pre-ceremony photos will take
- When guests will begin arriving
- Transportation time
Once your ceremony time is locked in, the rest of your wedding day schedule becomes much easier to build.
Pro tip:
Don’t start by randomly assigning times to everything.
Start with your ceremony and work backwards, then continue working forward from the ceremony into the reception.
Step 2: Check When Your Venue Opens
Before creating your timeline, find out exactly when you can access your wedding venue.
This is one of those details that is easy to overlook.
Ask your venue:
- What time can vendors arrive?
- What time can the wedding party arrive?
- When can setup begin?
- When can the florist begin decorating?
- When can the DJ or band load in?
- When can the caterer access the kitchen?
- When can guests enter?
- What time must everything be cleaned up?
- What time does the reception have to end?
Your venue’s access time can affect your entire wedding timeline.
For example, if your venue doesn’t open until noon but you want to have your first look at 11:00 AM, you will need to find another location for getting ready and photos.
Step 3: Talk to Your Wedding Vendors
Before finalizing your timeline, you need to have a talk with your wedding vendors.
Your vendors have done this before and can often tell you how much time certain parts of your wedding day will realistically take.
It’s a good idea to consult them when you plan your itinerary.
Your photographer can help you plan:
- Getting-ready photos
- First look
- Couple portraits
- Wedding party photos
- Family photos
- Reception photos
- Sunset portraits
And your hair and makeup team can help determine when all your beauty services should begin.
Your caterer can help you estimate how long dinner service will take.
Your DJ or band can help organize reception events.
Your venue coordinator can help coordinate setup, guest arrival and the reception schedule.
This is why your wedding timeline should be a collaborative document, rather than something you create completely on your own.
Step 4: Decide Whether You Are Having a First Look
A first look can completely change your wedding photography timeline.
If you are having a first look, you can take and complete many of your wedding photos before the ceremony.
Here is an example:
- 12:30 PM – First look
- 12:45 PM – Couple portraits
- 1:15 PM – Wedding party photos
- 1:45 PM – Family photos
- 2:15 PM – Bride and groom freshen up
- 2:30 PM – Guests begin arriving
- 3:00 PM – Ceremony
This can give you more time to enjoy your cocktail hour with your guests.
If you choose not to have a first look, you will likely need to schedule most of your couple, wedding party and family photos after the ceremony.
That can make your cocktail hour more photography-heavy.
There is no right or wrong choice about this.
It’s simply about what works best for you.
![First look wedding day schedule. Create unforgettable memories with a seamless first look wedding day schedule. This guide ensures your special moment is perfectly timed and stress-free. From capturing intimate photos before the ceremony to calming pre-ceremony jitters, a well-planned first look adds magic to your big day. Use our expert tips to sync with your photographer and stay on track. Wedding day schedule, first look tips, wedding timeline. [Pin now] to make your dream wedding a reality and enjoy every beautiful moment together!](https://www.culturewedding.ca/wp-content/uploads/2016/07/First-look-wedding-day-schedule.jpg)
Step 5: Create Your Getting Ready Timeline
Now it’s time to plan the morning.
This is where your wedding timeline can start getting a little more detailed.
You can read this post on exactly how long before your wedding ceremony you should be ready!
This will help you plan your morning wedding schedule.
Your getting-ready schedule may include:
- Breakfast
- Hair and makeup
- Bridesmaid hair and makeup
- Groom getting ready
- Detail photos
- Wedding dress photos
- Jewellery photos
- Wedding day detail photos
- Bridesmaid photos
- Mother-of-the-bride moments
- Getting dressed
- First look
- Transportation to the venue
Don’t forget to leave extra time for getting dressed.
Your wedding dress may take longer to put on than you expect, especially if it has a corset, buttons, complicated closures or multiple layers.
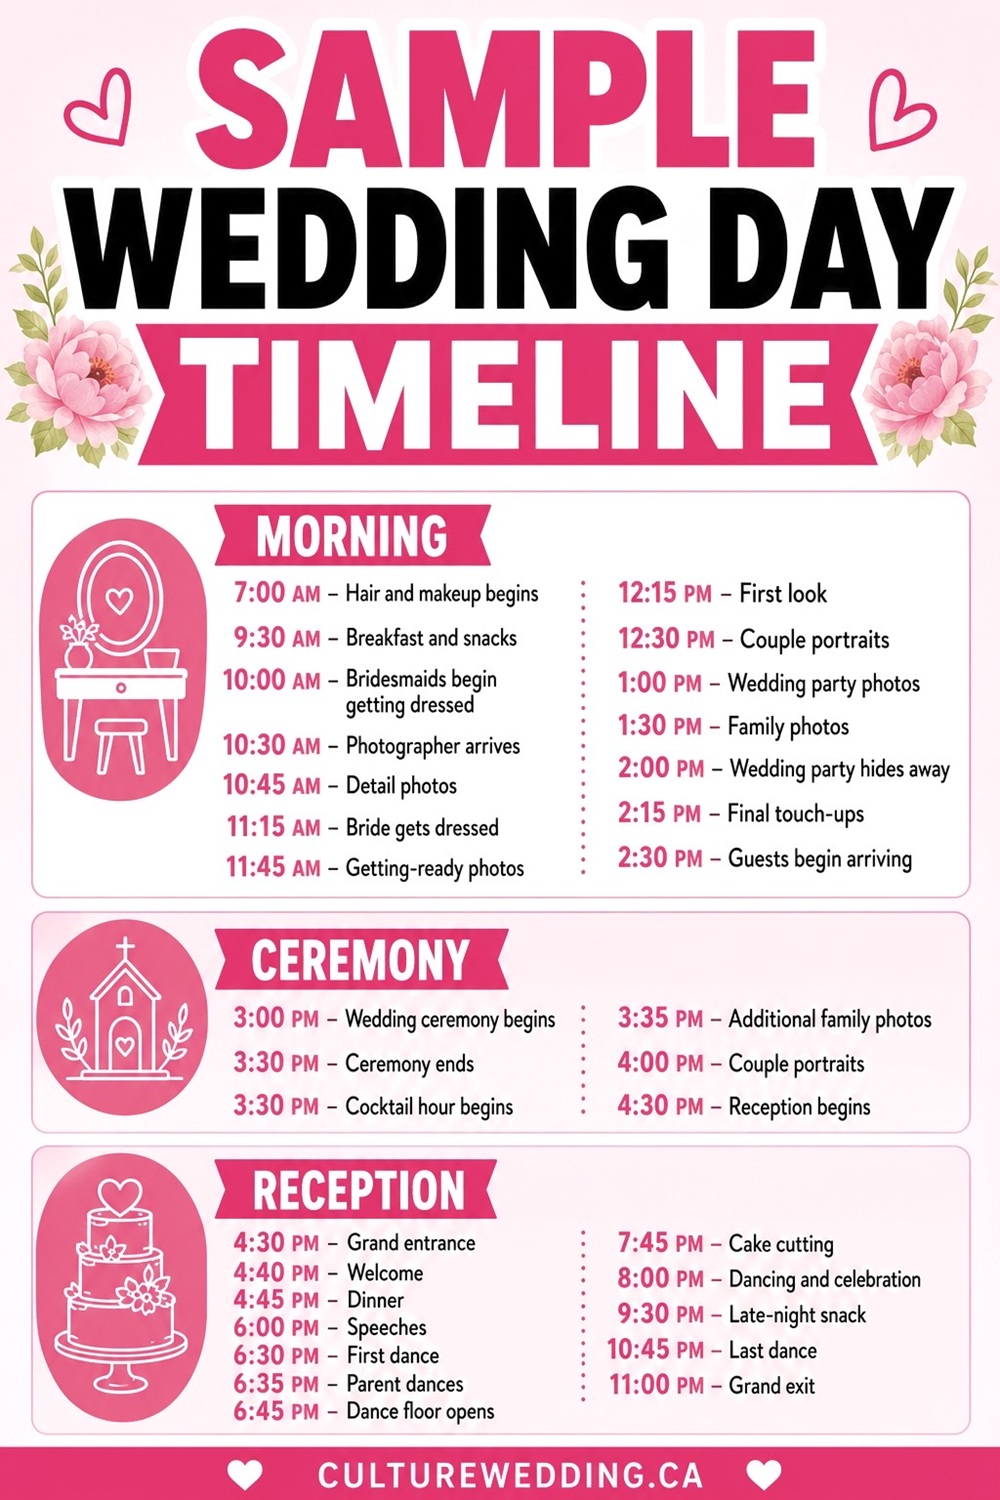
Example wedding morning timeline
- 7:00 AM – Hair and makeup begins
- 8:00 AM – Bridesmaids’ hair and makeup
- 10:00 AM – Breakfast/snacks and final beauty touches
- 10:30 AM – Photographer arrives
- 10:45 AM – Detail photos
- 11:15 AM – Bridesmaids get dressed
- 11:30 AM – Bride gets dressed
- 12:00 PM – Getting-ready photos
- 12:30 PM – First look
Remember that this is only an example.
Your actual wedding getting-ready timeline will depend on the number of people having their hair and makeup done, your photographer’s arrival time and your ceremony time.
====>>> Go here for more information on the perfect wedding day getting-ready timeline!
Step 6: Schedule Your Wedding Photography
One of the biggest mistakes couples make when creating a wedding day timeline is not allowing enough time for photos.
Your photographer will need time for more than just taking pictures of you walking down the aisle.
These are the things your wedding photography timeline may include:
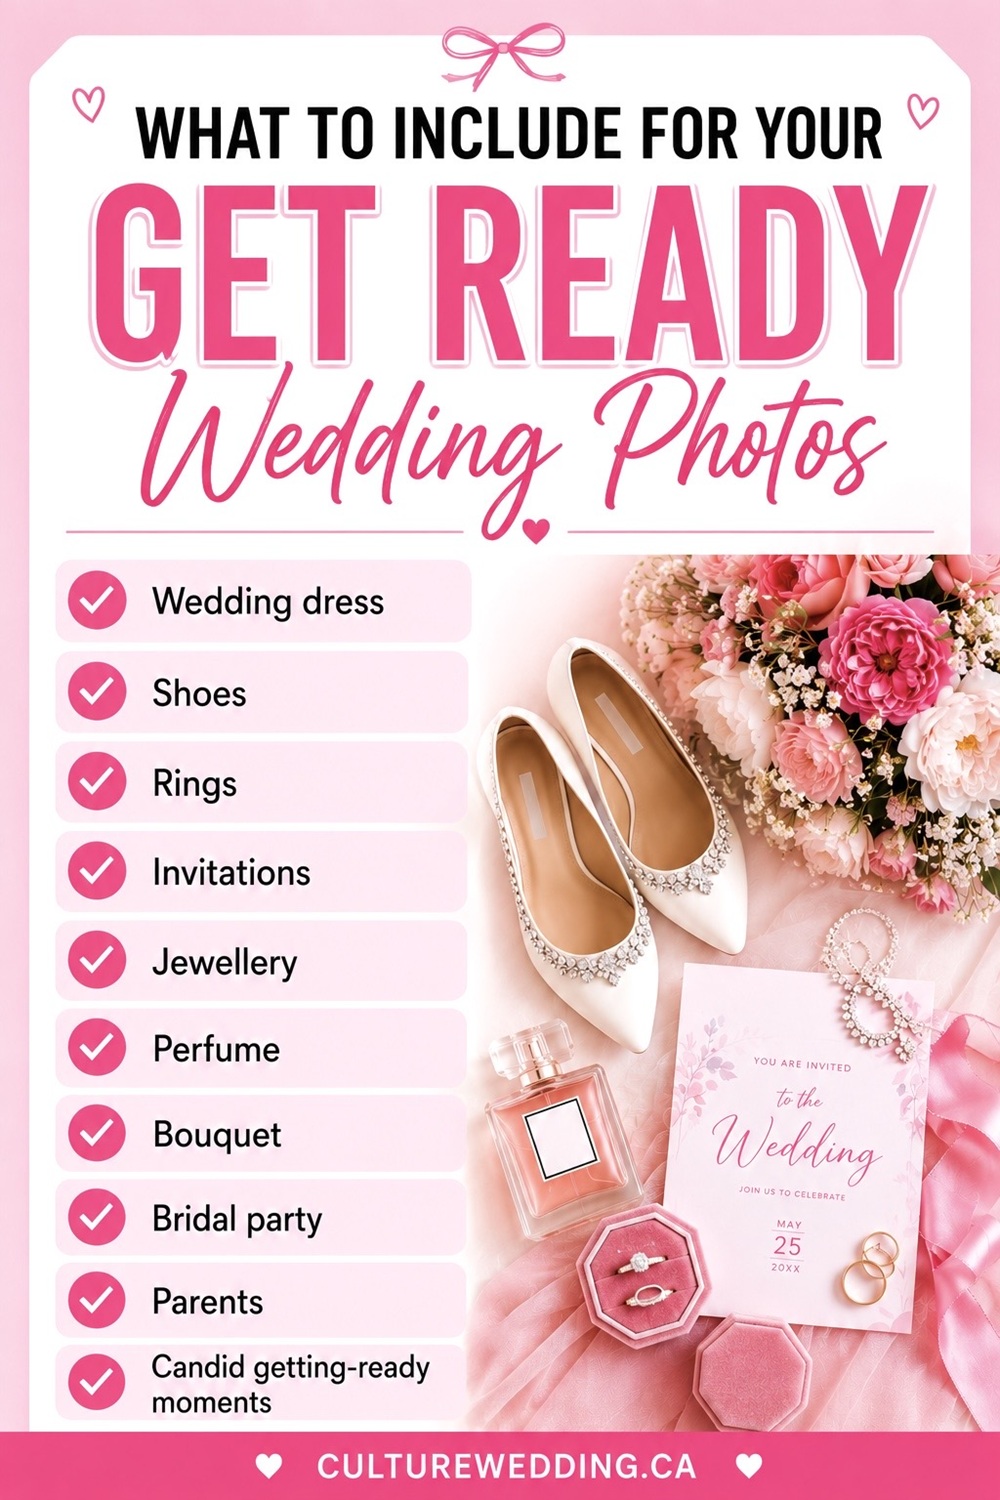
Getting-ready photos
These can include:
- Wedding dress
- Shoes
- Rings
- Invitations
- Jewellery
- Perfume
- Bouquet
- Bridal party
- Parents
- Candid getting-ready moments
First look
If you are having one, allow enough time for the first look and your initial reactions.
Couple portraits
Give yourselves enough time to actually enjoy these photos rather than rushing through them.
Wedding party photos
Don’t forget photos with:
- Bridesmaids
- Groomsmen
- Entire wedding party
Family photos
Make a list ahead of time.
For example:
- Couple + both sets of parents
- Couple + bride’s parents
- Couple + groom’s parents
- Couple + siblings
- Couple + grandparents
- Bride + parents
- Groom + parents
A family photo list can save you a surprising amount of time.
Golden hour or sunset photos
If beautiful sunset photos are important to you, check the sunset time for your wedding date and build this into your timeline.
This is especially important for fall and winter weddings, when daylight disappears much earlier.
Read next:
- Best wedding day tips and tricks
- 100 Day Before Your Wedding Checklist
- Most Forgotten Wedding Items Checklist
- Things To Do The Night Before Your Wedding
- Wedding Vendors To Book Checklist
- Wedding Week Checklist For Brides
- 12 Month Wedding Planning Checklist
- Simple Wedding Song List Template
Be sure to check out our wedding printable shop for more checklists, printables and everything you need to plan a wedding.
Follow us on Instagram for all the best wedding tips! And do not forget to join our new Facebook group dedicated to brides!